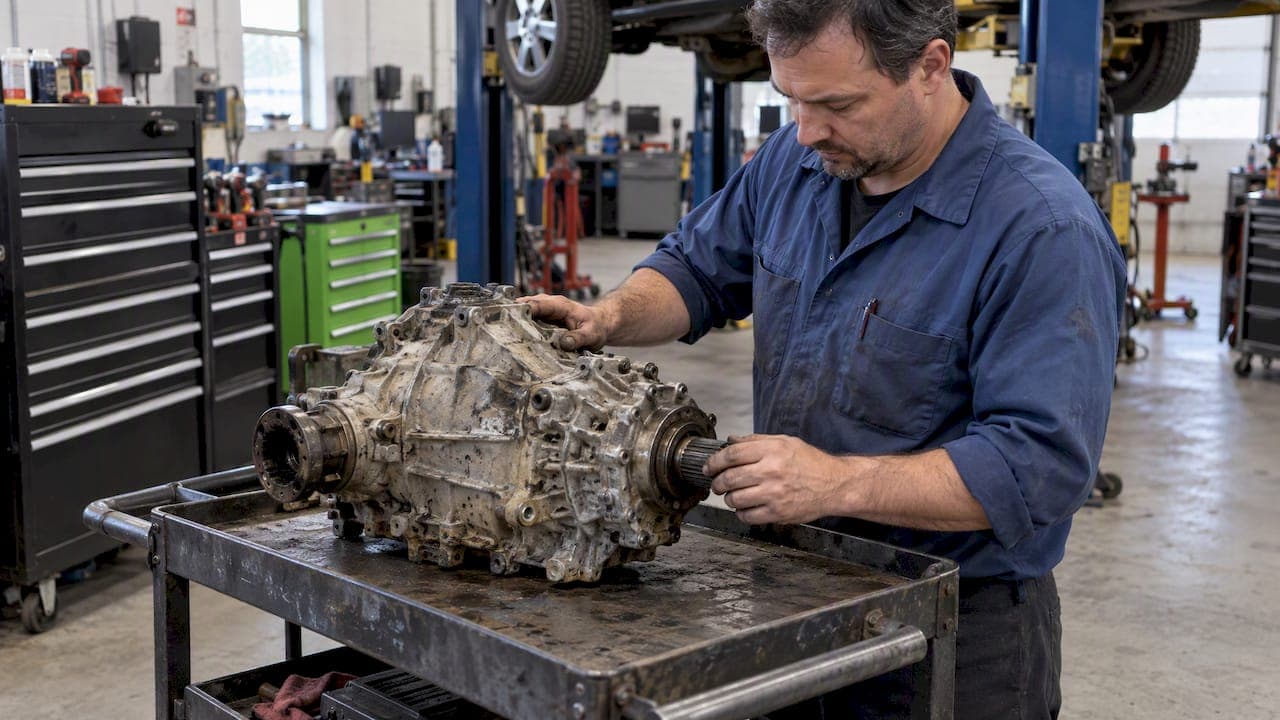
Transfer case failure most often starts with low or contaminated fluid that lets internal parts run hot and wear down fast. The single best move once you notice symptoms is to stop towing, avoid off-road or heavy-duty driving, and get a diagnostic scheduled right away. Waiting risks spreading damage into the transmission and axles, turning a moderate repair into a much larger one.
TL;DR:
- Ask the shop to inspect drained fluid, scan actuators, and check tire matching and driveline play before approving repairs because other faults can mimic it.
- Fluid service costs $120 to $300, versus $1,800 to $4,000 or more for replacement; vehicle and local labor rates change the final quote.
- Change transfer case fluid every 30,000 to 60,000 miles under normal use, and shorten the interval for frequent towing or off road use.
- Metal flecks point to internal wear; contamination generally favors replacement over rebuilding, so compare the estimate with vehicle value, especially after repeat failures.
Table of Contents
- Common Causes of Transfer Case Failure
- Warning Signs Your Transfer Case Is Failing
- Can a Bad Transfer Case Damage the Rest of the Drivetrain?
- How Mechanics Diagnose Transfer Case Problems
- Repair Options and Typical Cost Ranges
- Prevention and Maintenance to Avoid Transfer Case Failure
- What Shops Often Miss, and When Selling Makes More Sense
- The Real Lesson Owners Miss About Transfer Case Failure
- Sell Instead of Repair: A Straightforward Cash Option
- FAQ
- Sources
Common Causes of Transfer Case Failure
Most transfer case problems trace back to fluid. When fluid runs low or gets contaminated, it stops cooling and lubricating properly, which lets the chain, gears, and bearings run hotter than they should. Over time that heat accelerates wear on every moving part inside the case, and what starts as a minor seep can end in total failure. Missed fluid changes are the single biggest driver of these failures, according to transmission shop data, with overheating, gear grinding, bearing wear, and chain stretching following close behind.
The mechanical failure points shops see most often include:
- Chain stretch or breakage from prolonged low-fluid operation
- Bearing pitting caused by heat and metal debris circulating in old fluid
- Gear tooth wear from friction when lubrication breaks down
- Cracked housings from impact damage, often off-road
- Seal and gasket failure that lets fluid escape slowly over time
Electronic components fail independently of the mechanical ones. Shift motors and actuators control engagement between two-wheel and four-wheel drive, and when they stick or fail outright, the vehicle may refuse to shift modes or get stuck in one. This is a distinct failure path from fluid-related wear, and it often shows up with dashboard warning lights rather than noise.
External factors also push cases toward failure faster than normal use would. Heavy towing and sustained high-load driving stress the chain and bearings beyond their typical duty cycle. Off-road shock loading, hard impacts from rocks or ruts, can crack housings or knock components out of alignment. Mismatched tire sizes, especially on all-wheel-drive vehicles, force the system to compensate for different rotation speeds between axles, which adds constant strain that most owners never notice until something breaks. Worn U-joints, CV joints, and other driveline faults can mimic or accelerate transfer case wear, which is part of why isolating the actual source of a symptom matters before paying for a repair.
Warning Signs Your Transfer Case Is Failing
Transfer case symptoms have a pattern, and learning to read them helps you describe the problem accurately when you call a shop.
- Grinding or whining noises that get louder with speed usually point to bearing wear or low fluid, while popping or clicking during slow turns often signals internal gear or chain wear, a distinction Alberta Transmission notes is key to narrowing down the cause before a teardown.
- Slow, intermittent, or failed engagement into 4WD or AWD suggests either a sticking actuator or internal wear preventing smooth gear changes, and a vehicle stuck in one drive mode often means an electronic fault rather than a mechanical one.
- Fluid puddles under the center of the vehicle, dark or burnt-smelling fluid, or metal flakes in a fluid check are strong indicators of internal damage, since metallic content in the fluid means parts are already grinding against each other.
- Binding on turns, drivetrain vibration, or jerking under load points to a transfer case struggling to distribute power evenly, a symptom that can also stem from mismatched tires rather than the case itself.
- Dashboard warning lights tied to the driveline deserve a direct report to your technician, including when the light came on and what you were doing at the time, since that context speeds up diagnosis considerably.
Can a Bad Transfer Case Damage the Rest of the Drivetrain?
Yes, and this is the main reason early diagnosis matters more than most owners assume. A transfer case does not fail in isolation. Metal contamination in the fluid can migrate toward connected components, and vibration from worn internal parts transmits stress to everything the transfer case touches.
The cascading risk runs in a few predictable directions. Transmission wear accelerates when contaminated fluid or metal debris reaches shared lubrication paths or when vibration loosens transmission mounts and seals. Axle and differential components face added stress when power delivery becomes uneven, since the differentials were engineered to handle smooth, consistent torque, not the jerky load swings a failing case produces. Driveshaft bearings wear faster under constant vibration, shortening a part that is otherwise built to outlast most of the vehicle.
Certain behaviors accelerate this chain reaction. Continuing to drive with a visible fluid leak means the case is running on borrowed lubrication, and every mile adds wear that cannot be undone with a fresh fluid fill. Towing with a transfer case already showing symptoms multiplies the load on parts that are already compromised, often turning a seal repair into a full rebuild within a matter of weeks. The pattern is consistent across shop reports: the longer symptoms go unaddressed, the more components end up on the repair invoice.
How Mechanics Diagnose Transfer Case Problems
A thorough diagnostic follows a specific order, and knowing the steps helps you judge whether a shop is doing a complete job or just guessing.
- Visual inspection of the case, vent, and fill/drain plugs checks for active leaks and confirms fluid level before anything else happens.
- Fluid drain-and-inspect is the step Tri-City Transmissions treats as the most reliable indicator available: clean fluid suggests an external or electronic cause, while dark, burnt, or metal-flecked fluid points to internal damage.
- Scan tool codes reveal whether an actuator or shift motor is reporting a fault, and a bench test on that component confirms or rules it out without opening the case.
- Driveline play checks on U-joints, CV axles, and the driveshaft rule out symptoms that mimic transfer case failure but actually originate elsewhere, along with a tire-size and wear match check since mismatched tires create similar binding symptoms.
- A road test reproduces the noise, vibration, or engagement issue under real conditions, which helps separate a transfer case problem from a transmission or differential issue that sounds similar from the driver's seat.
Pro Tip: Ask the shop to show you the drained fluid before they recommend a repair; clean fluid versus metal-laden fluid changes the entire conversation about cost and urgency.
A proper written quote should separate the diagnostic fee from labor and parts, specify whether replacement parts are new, remanufactured, or used, and state what warranty applies to each. Shops that skip this breakdown make it harder to compare quotes or catch an inflated estimate, and a clear written quote is one of the simplest ways to protect yourself from paying for the wrong fix twice.
Repair Options and Typical Cost Ranges
The right fix depends entirely on what the diagnostic finds, and costs vary widely based on severity and vehicle type.
Simple services handle the earliest-stage problems. A fluid change addresses contamination caught before it causes wear, while a seal or gasket repair stops an active leak before fluid runs low enough to cause damage. These services work when the fluid comes back clean and the symptoms are limited to a leak or a recent service lapse rather than ongoing noise or engagement failure.
Electronic fixes apply when a scan tool or bench test confirms an actuator or shift motor fault rather than internal mechanical wear. Replacing the faulty component typically resolves engagement problems (slow shifts, stuck modes, or a dashboard warning light) without touching the internal gears or chain at all.
Internal repairs and full rebuilds sit at the other end of the spectrum. When fluid inspection turns up metal debris, the case likely needs to come apart for chain, bearing, or gear replacement, or it needs a full rebuild or replacement unit. Contamination generally favors replacement over rebuild for long-term reliability, since a case that has already circulated metal through its internals carries a higher risk of repeat failure even after a rebuild.
Typical 2026 cost ranges, based on shop-reported pricing, break down as follows:
- Fluid service: $120 to $300
- Seal or leak repair: $250 to $900
- Actuator or shift motor replacement: $500 to $1,500
- Chain, bearing, or internal repair: $1,000 to $2,500
- Full rebuild or replacement: $1,800 to $4,000 or more
These ranges shift significantly depending on vehicle make, part availability, and labor rates in your area, so treat them as a planning guide rather than a quote. The same repair-versus-replace tension shows up across other vehicle systems too. With windshield repair versus replacement, the decision often comes down to how far damage has spread, which is the same logic that applies to a transfer case once contamination sets in.
Before agreeing to any repair, ask the shop directly whether the replacement parts are new, used, or remanufactured, what warranty covers the work, and whether related driveline items (U-joints, CV axles) are included in the quote or billed separately. These answers affect both the price you pay today and how long the fix is likely to last.

Prevention and Maintenance to Avoid Transfer Case Failure
Most transfer case failures are preventable with a maintenance routine that matches how the vehicle is actually used.
- Follow a fluid change interval of roughly 30,000 to 60,000 miles under normal conditions, and shorten that window if you tow regularly or drive off-road often.
- Check for slow leaks and inspect the vent periodically, since a plugged vent can quietly force fluid past seals long before you notice a puddle.
- Match tire size and wear across all four positions on AWD and 4WD vehicles, since mismatched tires force the system to compensate constantly and wear parts well ahead of schedule.
- Run a quick inspection before long trips and again after any serious off-road use, checking fluid level and color along with a look underneath for fresh leaks.
Pro Tip: Schedule a fluid service right after any trip involving sustained towing or rough off-road terrain, even if nothing seems wrong. Catching contamination early is far cheaper than waiting for symptoms.
What Shops Often Miss, and When Selling Makes More Sense
Shops sometimes skip the tire-match and driveline-play checks because they take extra time, which leads to a transfer case repair recommendation when the real issue was a worn U-joint or mismatched tire all along. A careful diagnostic rules those out first.
Repair makes sense when the diagnostic finds a contained issue, a leak, an actuator, or a fluid problem caught early, on a vehicle that still has resale or use value ahead of it. Selling becomes the more practical choice when repair costs start approaching what the vehicle is worth, when the transfer case has failed more than once despite repairs, or when you need the vehicle gone quickly without sinking more money into it. Those decision points come up constantly with vehicles that have blown transmissions too, where the math often favors removal over repair.
— Franz
The Real Lesson Owners Miss About Transfer Case Failure
The conventional advice on this topic leans too hard on symptom checklists and not enough on timing. Most guides tell you what grinding or a stuck 4WD light means, but they underplay how fast a cheap fix window closes. A seal leak caught early is a few hundred dollars. The same leak ignored for another month can mean metal in the fluid and a bill that is five times higher.
What gets overrated is the instinct to wait and see if a noise goes away. It rarely does, and every mile driven with contaminated fluid spreads wear to parts that were fine yesterday. What matters most is getting the fluid drained and inspected the moment something feels off, because that single check tells you more than any noise or dashboard light ever will.
The reader's real priority should be matching the repair decision to the vehicle's actual worth, not just the symptom in front of them. A transfer case repair on a vehicle with years of life left is worth doing. The same repair on an aging vehicle with other issues stacking up often is not.
Sell Instead of Repair: A Straightforward Cash Option
When a transfer case repair estimate climbs past what your vehicle is worth, or the case has already failed more than once, selling outright is often the more sensible path. We buy running and non-running vehicles across Calgary and Okotoks, including cars with blown engines or transmission failure, and we pay cash on pickup the same day, with no hidden fees buried in the offer.

Our process runs in three steps: contact us for a quote, schedule pickup, and receive payment in cash on the spot. Before you call, have these ready:
- Your vehicle's year, make, and model
- The vehicle title or registration
- A general description of the transfer case or drivetrain issue
Get a cash offer today and have the vehicle gone before the next repair bill arrives.
FAQ
What happens if a transfer case fails?
A failed transfer case typically means internal components like the chain, bearings, or gears have worn down to the point where the vehicle struggles to engage or maintain 4WD or AWD. Left unaddressed, the damage can spread to the transmission and other driveline parts through metal contamination and vibration.
Can you drive with a failed transfer case?
Driving with a failing transfer case is risky because continued use accelerates wear and raises the chance of cascading damage to the transmission or axles. It's best to limit driving to what's necessary to reach a shop and avoid towing or off-road use until a technician inspects the fluid and components.
Can I still drive my truck with a bad transfer case?
A truck with early-stage symptoms, mild noise or occasional hesitation shifting into 4WD, can often still be driven short distances, but towing or heavy loads should stop immediately. If fluid shows metal debris or the truck gets stuck in one drive mode, further driving risks turning a moderate repair into a full rebuild.
Is it worth fixing a transfer case?
It depends on the repair cost relative to the vehicle's value and how many times the case has already failed. A contained issue like a seal leak or actuator fault on an otherwise healthy vehicle is usually worth fixing, while repeated internal failures on an older vehicle often make selling the more practical choice.
Sources
- Signs of a faulty or failing transfer case — Alberta Transmission
- Transfer case failure signs & maintenance tips — Midwest Trans
- Transfer case repair cost 2026 — Rohnert Park Transmission
- Clutches & transfer cases — Tri-City Transmissions
- Transfer case replacement: what Edmonton drivers need to know — Jasper Auto and Truck